
Written steps are the source of truth for this guide.
Videos and screenshots are supporting demonstrations. Follow the written steps and confirm the current screen, account, registry, and resource state before acting.
Route, PTR, and NS operations inside the i.lease Lease In contract workflow
After a lease-in contract is created, operational network delivery continues through the contract-level Route, PTR, and NS modules. These are the real execution requests used to prepare the leased prefix for use.
This guide explains how to start from the contract workflow, open each module, submit the required requests, and understand the status and follow-up actions for each step.
Open the Right Contract First
Open your lease-in contracts, select the correct contract, then open its network configuration. Sign in when prompted; the selected workspace destination is retained through login and any required company setup.
Check the company, contract reference, and allocated CIDR before opening Route, PTR, or NS. Those pages belong to a specific contract and allocation; use the actions shown inside your contract. Opening this guide or the contracts list does not submit a request or change a network record.
If you have not leased a resource yet, start with the Lease In Module Guide. If the contract is missing or an action is unavailable, check the selected company, payment state, and request status. Contact i.lease with the contract reference if you still need help; do not send credentials or private access links.
What These Modules Do
| Module | Purpose | Typical input |
|---|---|---|
| Route | Creates or updates the route object and related authorization details for the leased prefix. | Prefix, CIDR, ASN, data center details, authorizer, abuse contact details, and supporting authorization file when required. |
| PTR | Submits reverse DNS PTR records for specific IP addresses inside the allocation. | IP address and DNS hostname pairs. |
| NS | Submits reverse zone delegation settings for the leased subnet. | Reverse zone, subnet, nameserver list, and the same-NS-for-all option. |
Step 1: Start From the Contract Route Config Wizard
Open the contract network operations entry from the contract workflow. The Route Config Wizard shows the real request progress for each paid allocation and tells you which module is required next.
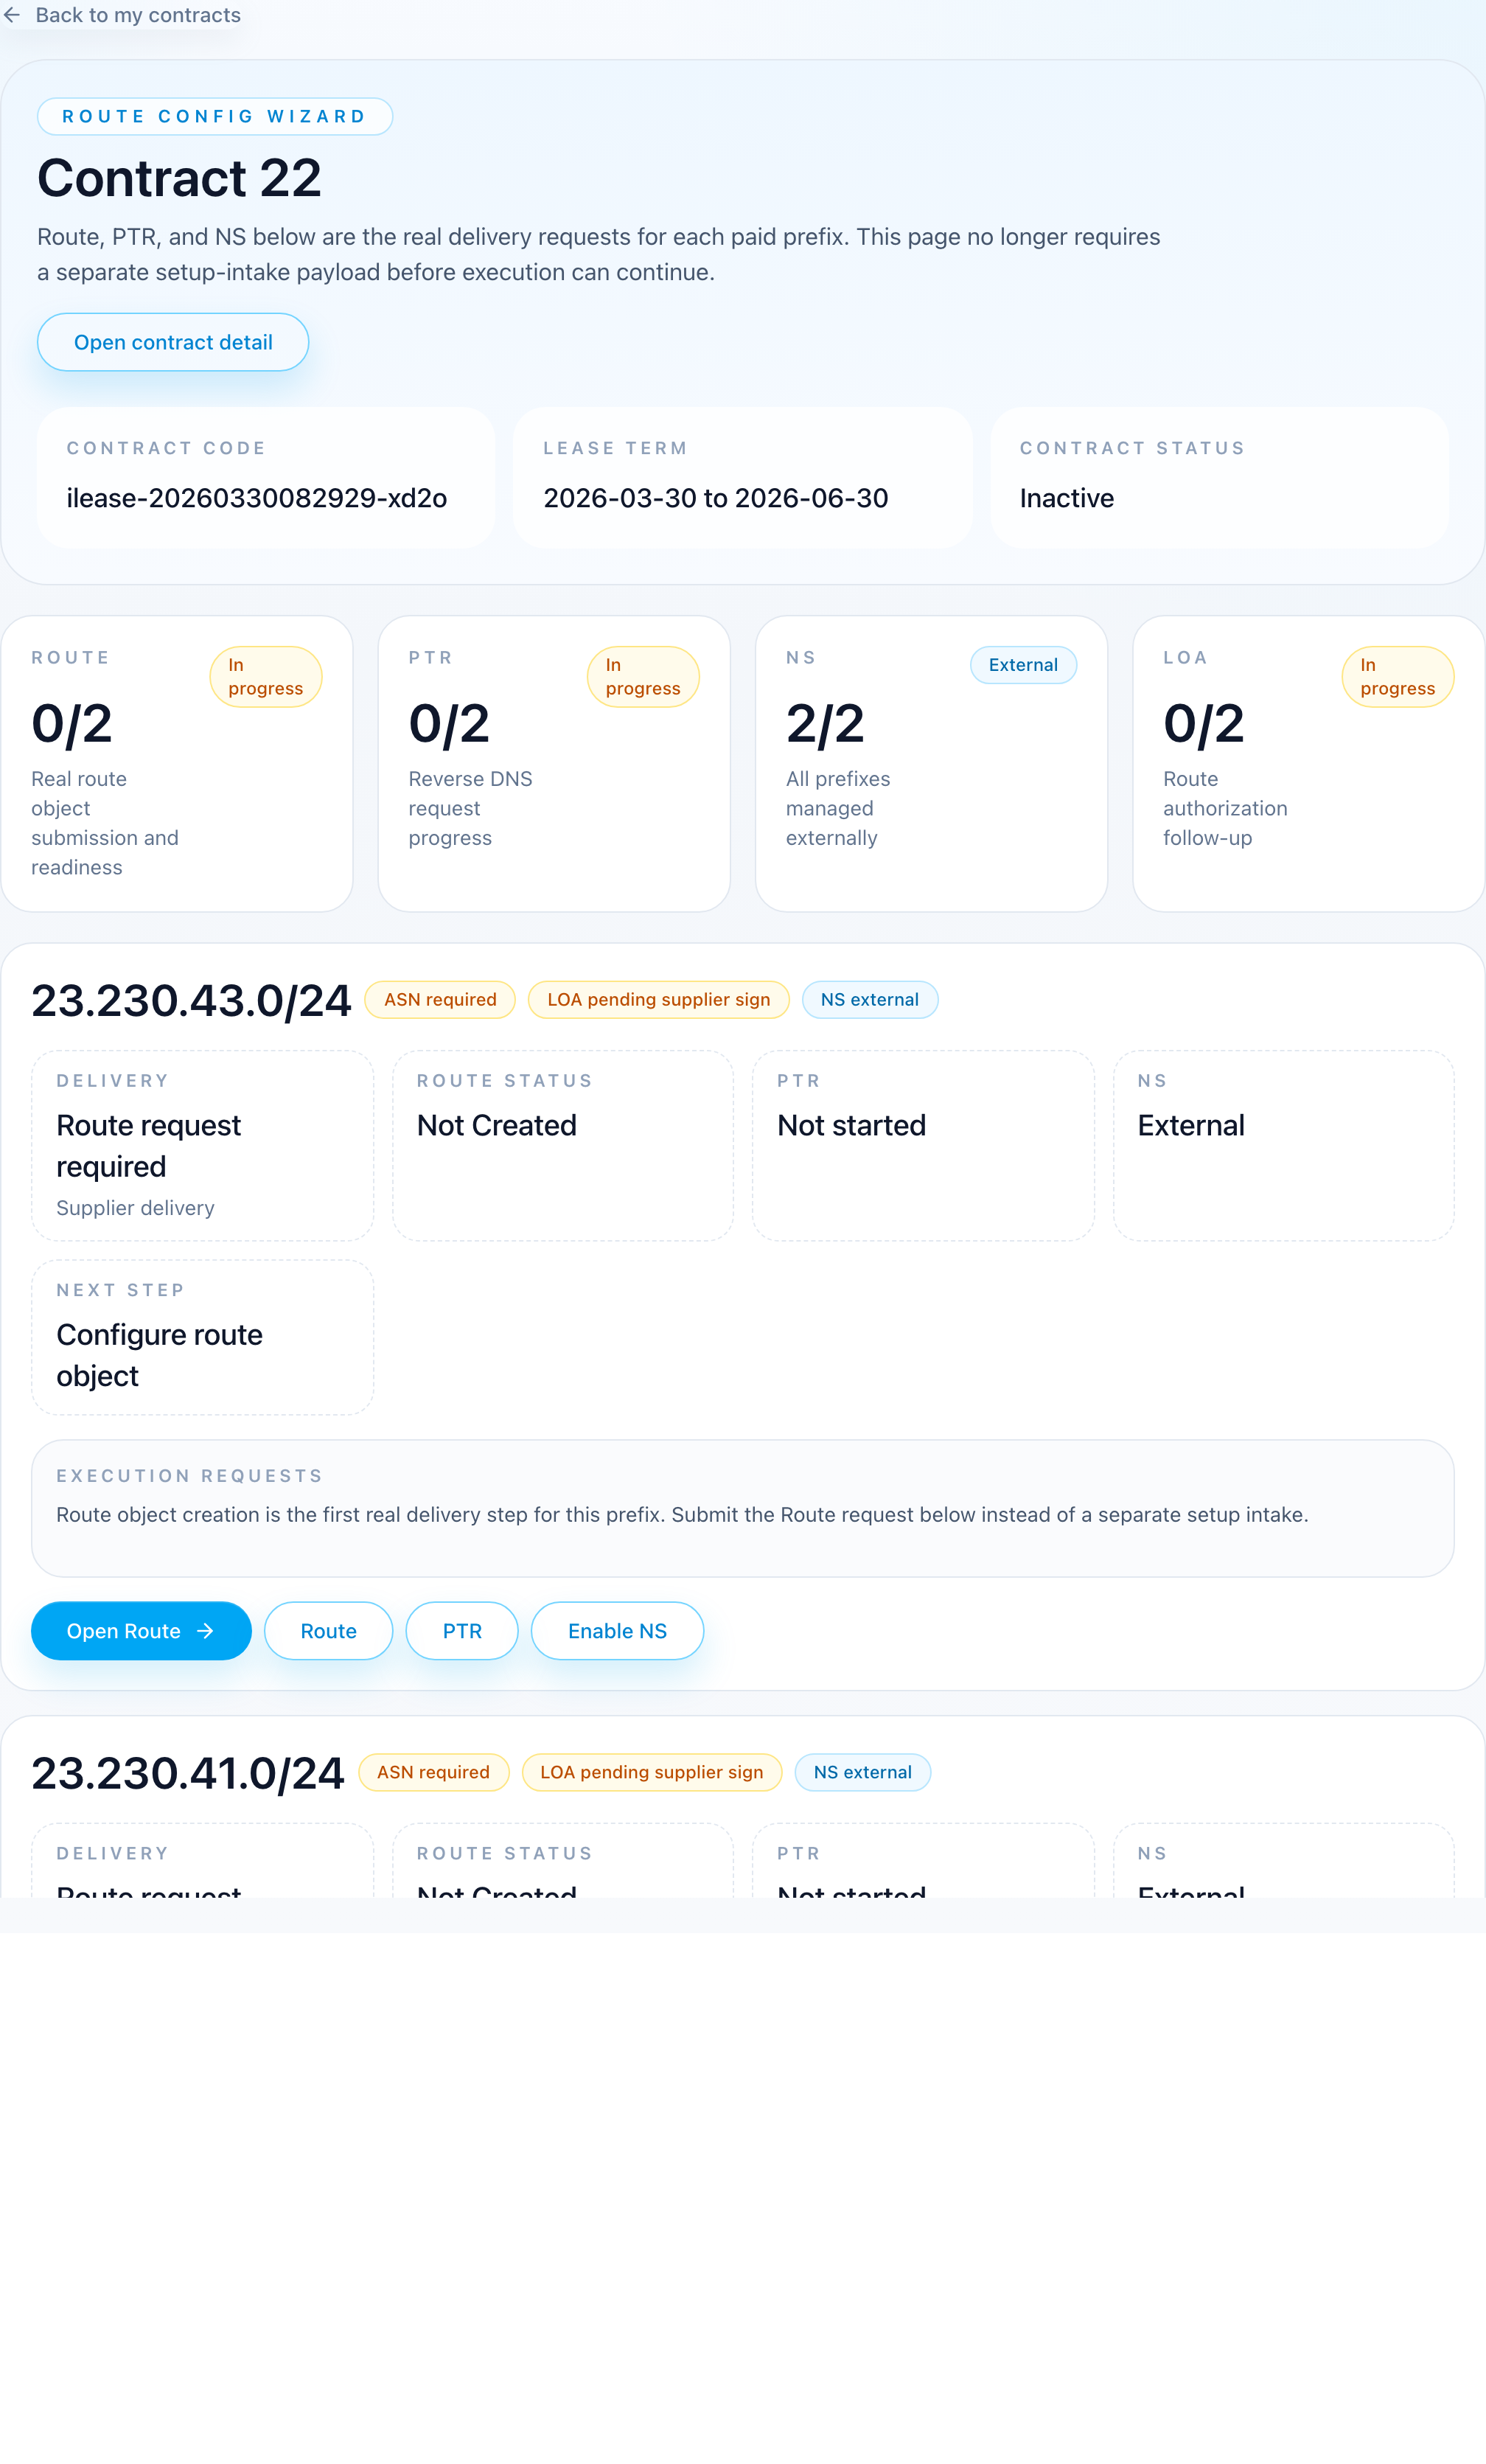
- Review the summary cards for Route, PTR, NS, and LOA.
- Find the target allocation row by its CIDR.
- Check the current badges and the Next step field.
- Use the primary action button such as Open Route, Open PTR, or Open NS.
- If PTR or NS is currently external and you want to manage it inside i.lease, use Enable PTR or Enable NS before opening the module.
Step 2: Submit the Route Object First
Route object creation is the first operational delivery step for a prefix. If the route request is missing or rejected, complete the Route page before moving to PTR or NS.
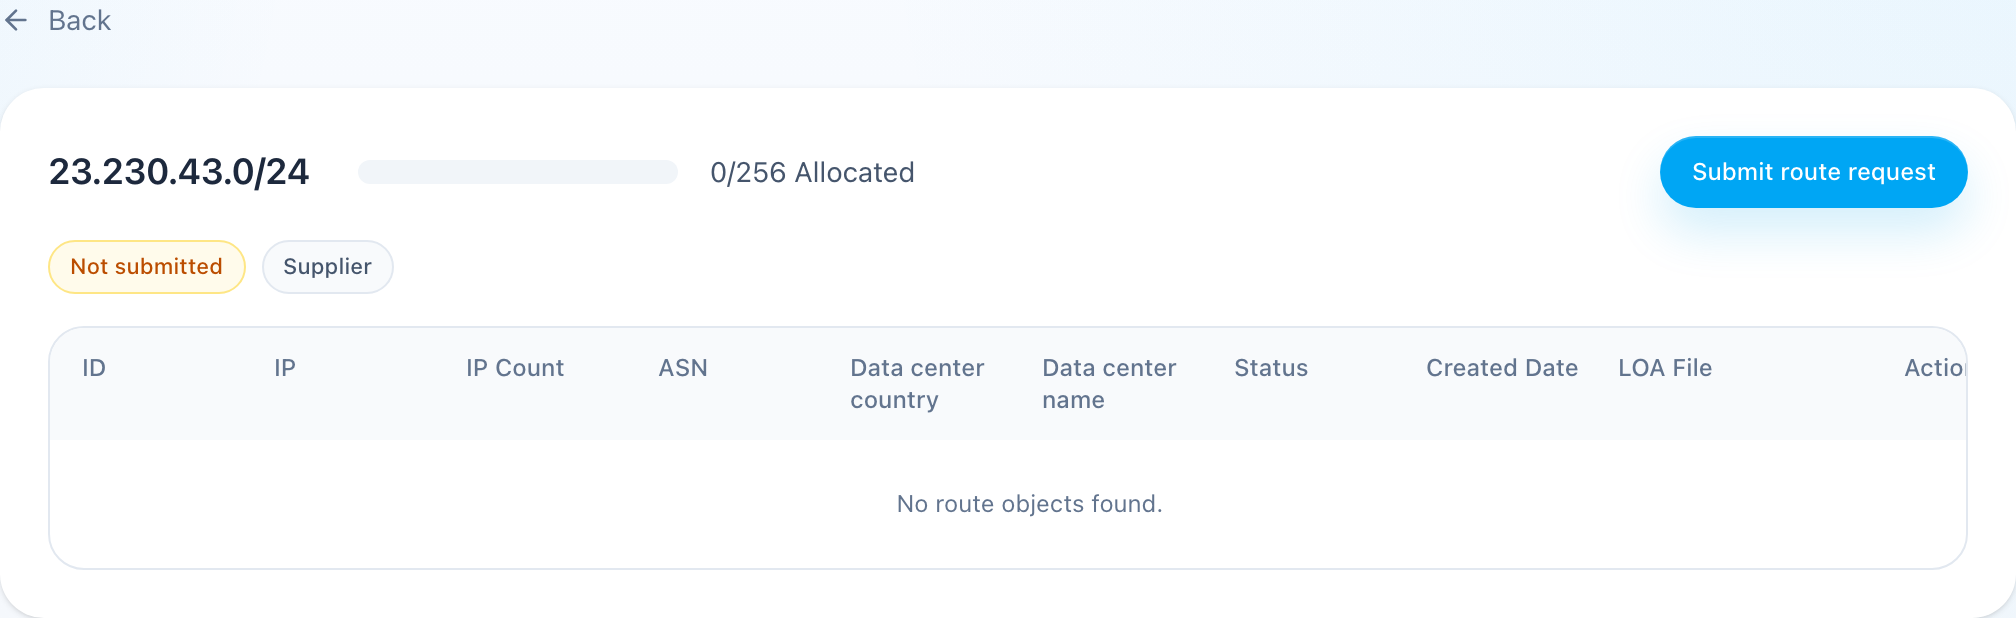
Route Page Actions
- Open the target allocation’s Route page.
- Review existing route object rows, if any.
- Use Create Route Object when no usable route object exists yet.
- Use the row action menu to View, Edit, or Delete a route object when updates are still allowed.
- If the LOA file is available, use Download LOA.
- Use Set Geofeed and Verify Geofeed when the route workflow requires geolocation follow-up.
Required Route Form Fields
The route object form requires the operational and authorization details for the leased prefix.
- IP Prefix and IP CIDR
- ASN
- Data Center Country, Data Center City, and Data Center Name
- Authorizer
- Abuse Contact, Abuse Mobile, Abuse Email, and Abuse Address
- Optional fields such as Data Center Address and Remark
If the authorizer is changed and the new value is not English, the page also requires Authorizer English and an Authorizer File before submission.
When Route Editing Is Locked
If the latest Route request is already submitted, processing, or waiting on supplier/platform follow-up, the page becomes effectively read-only for update actions. In that state, track the request instead of trying to overwrite it.
Step 3: Submit PTR Records
Use the PTR page when reverse DNS PTR entries are required for the allocation. PTR requests are submitted as a list of IP-to-hostname pairs.
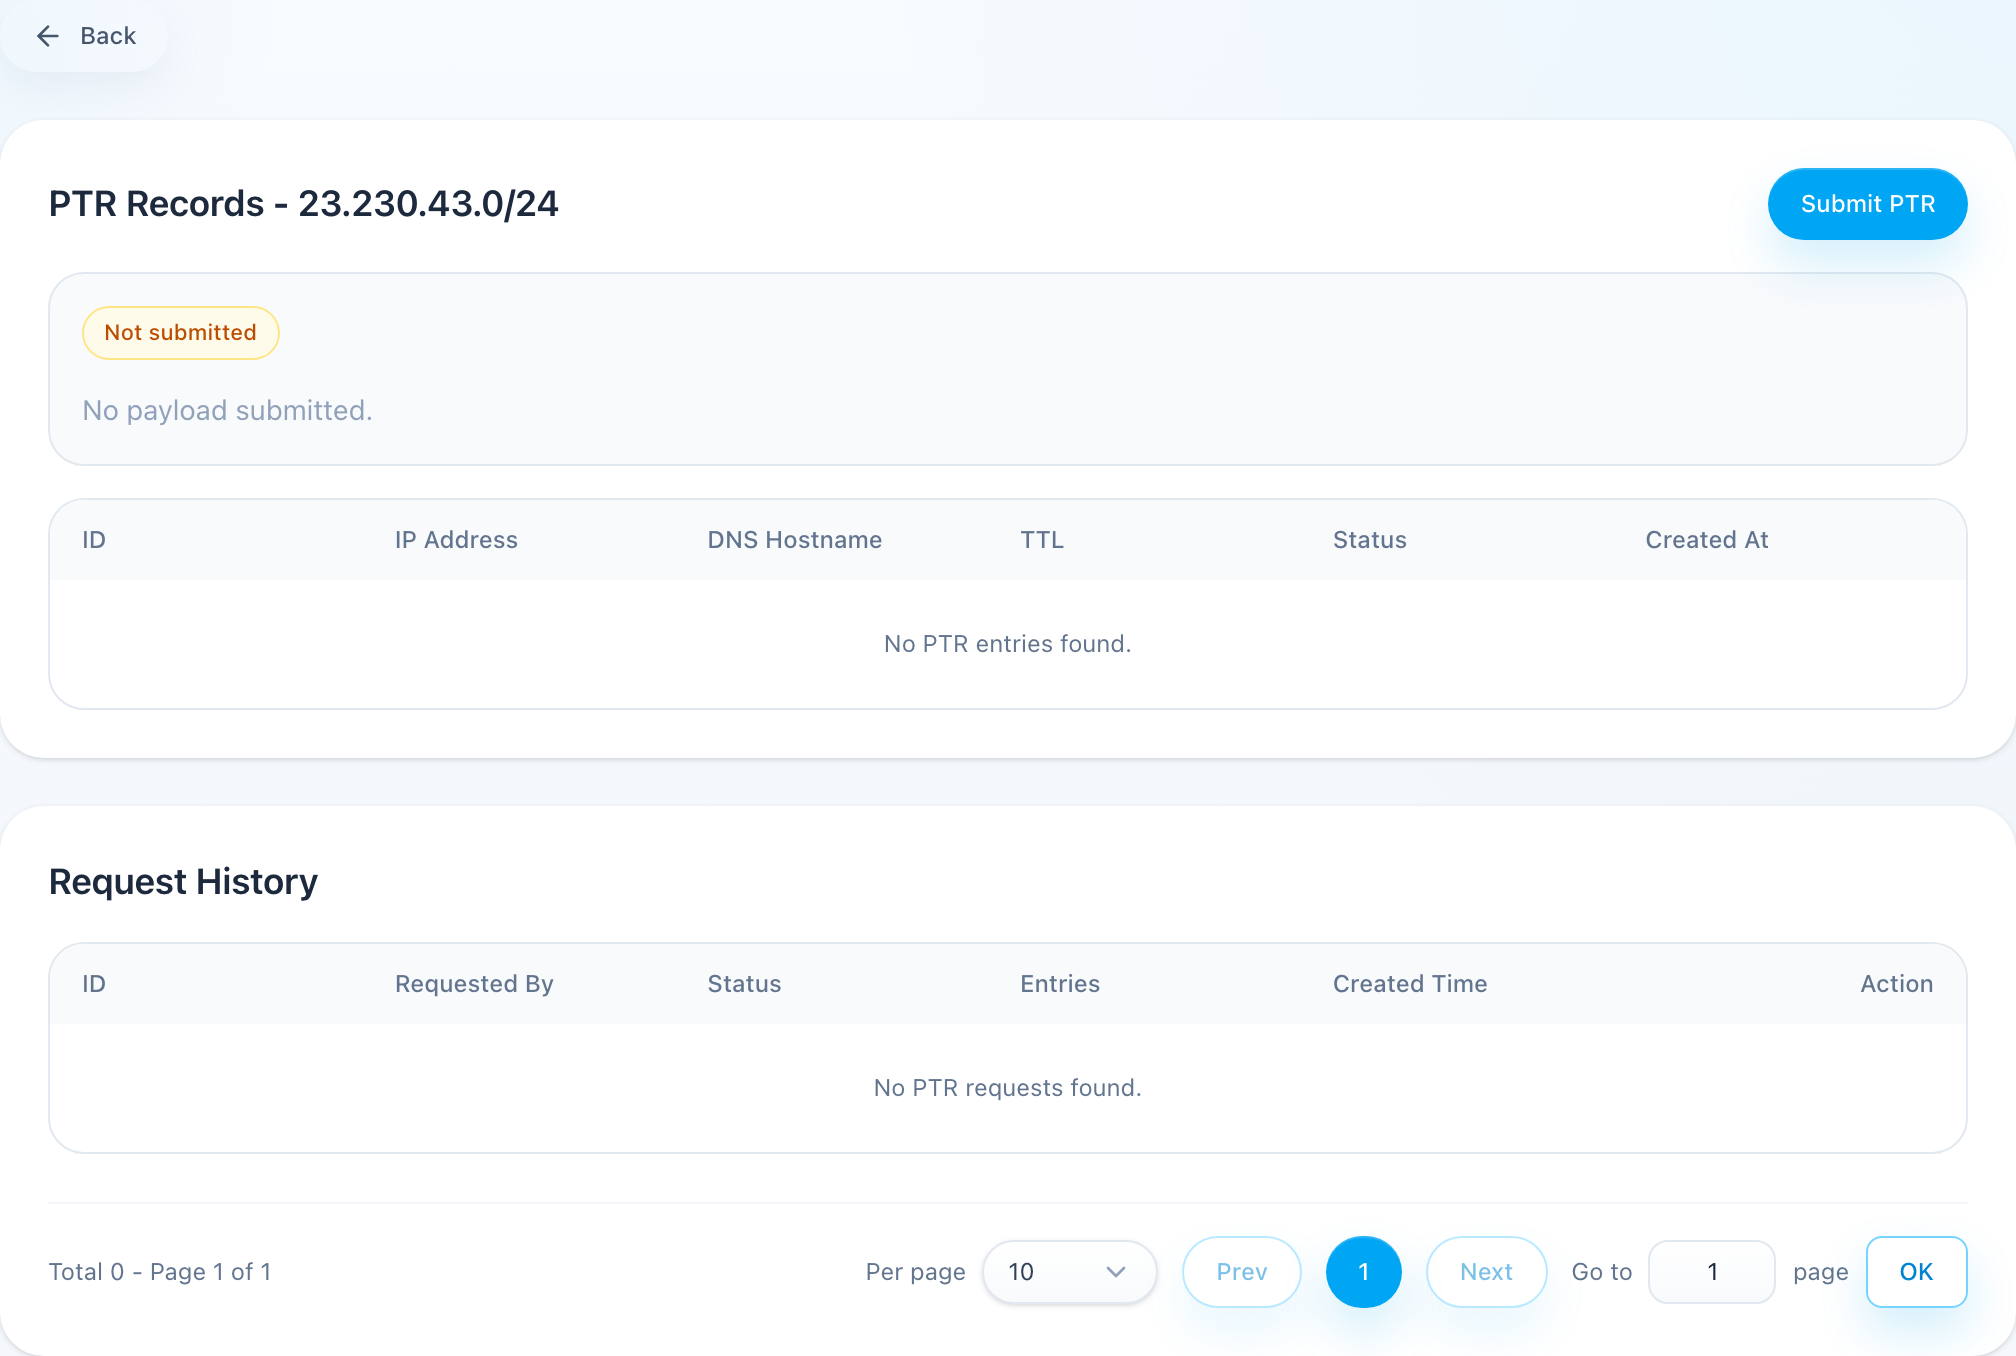
- Open the target allocation’s PTR page.
- Review the current request status, owner badge, helper text, and reject reason if one exists.
- Review the current PTR entries table if records already exist.
- Click Submit PTR Request to open the PTR form.
- Add one or more rows of IP Address and DNS Hostname.
- Use Add row or Remove to adjust the request payload.
- Submit the request and then track it in the request history section.
PTR Validation Rules
- Every row must contain both an IP address and a DNS hostname.
- The IP address must be a valid IPv4 value.
- If the request quota or contract conditions block submission, the page shows the reason and blocks the action.
PTR Request History
The PTR page keeps a request history list and a detail view. Use it to review who submitted a request, how many entries were included, the audit record, and why a request was rejected if it did not pass review.
Step 4: Submit NS Delegation
Use the NS page when reverse zone delegation is managed inside i.lease. This page submits the nameserver payload for the allocation’s reverse zone.
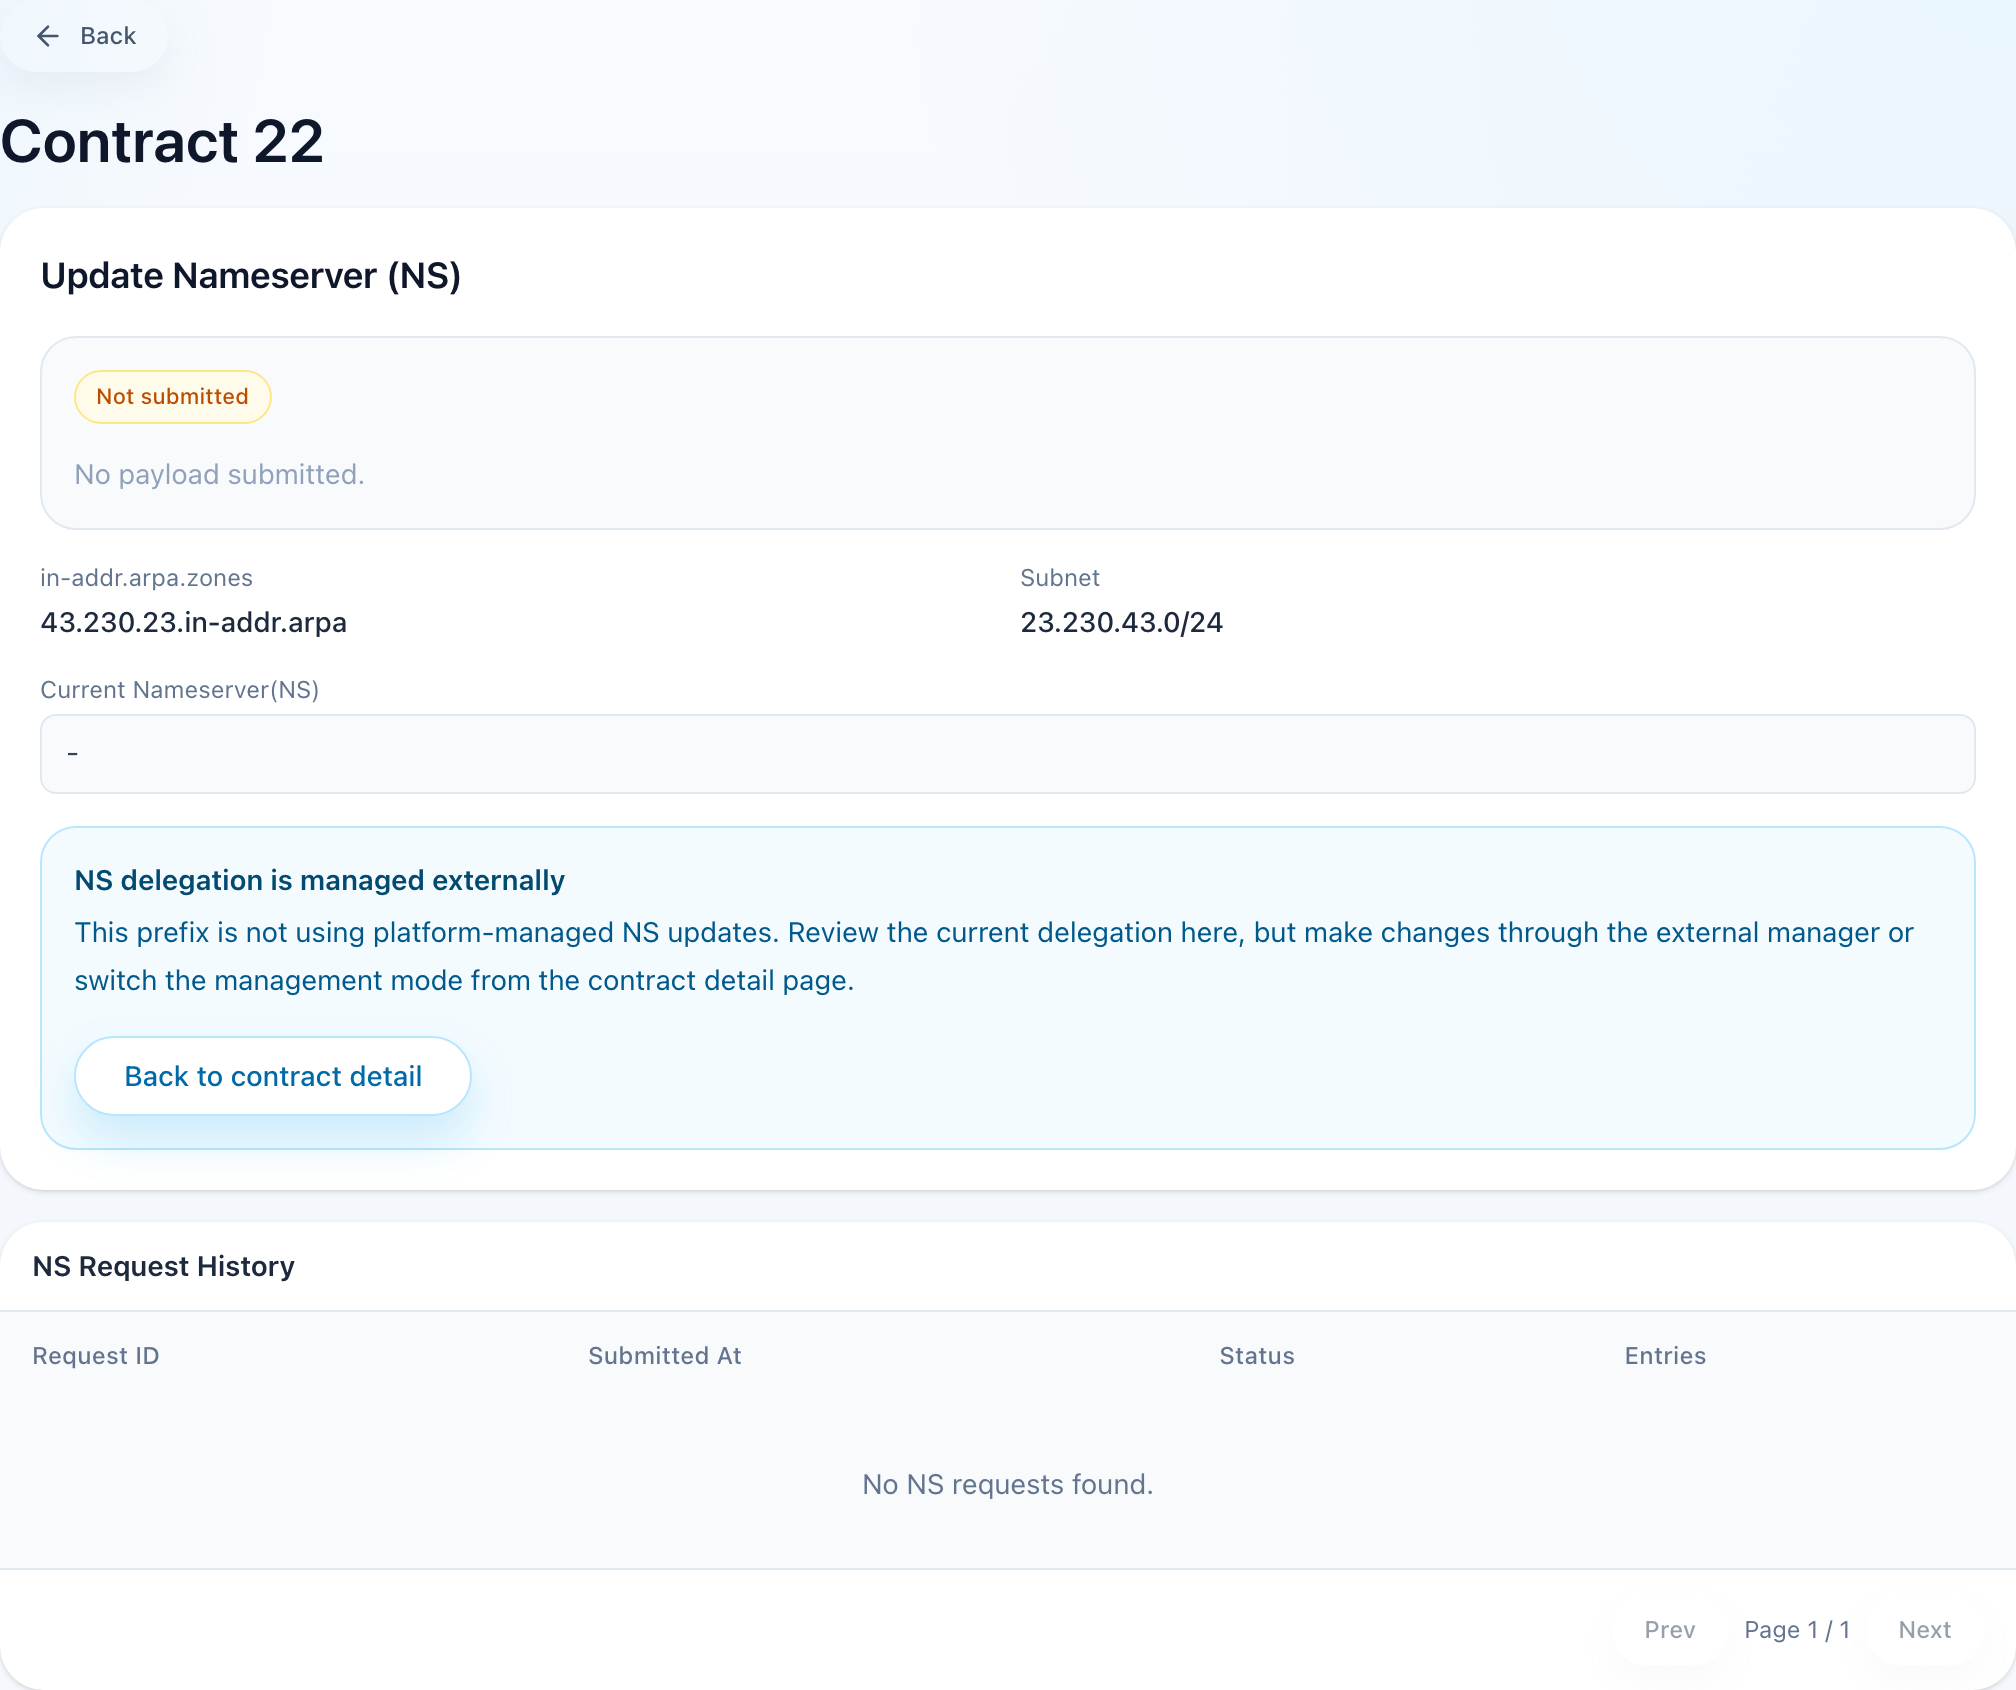
- Open the target allocation’s NS page.
- Review the current request status and owner type.
- Confirm the prefilled Reverse Zone and Subnet values.
- Enter the Nameservers, one per line.
- Choose whether the same nameservers should be used for the whole delegation by setting Same NS for all.
- Click Save Changes to submit the NS request.
NS Request Rules
- The NS request cannot be updated while it is already under review or processing.
- If NS management is disabled for the allocation, the page treats it as externally managed and the operational work should happen outside the i.lease NS workflow.
- If the last request was rejected, review the history and resubmit a corrected nameserver payload.
Recommended Operational Order
- Start in the Route Config Wizard and check the next required step.
- Complete the Route request first if it is missing or rejected.
- Submit PTR if PTR management is enabled and the page says it is required.
- Submit NS if NS management is enabled and the page says it is required.
- Track progress in each page’s status badges and request history instead of resubmitting while a request is locked.
Status and Follow-Up Tips
- Not submitted means the operational request still needs to be created.
- Submitted or Processing means follow-up is in progress and the current payload should usually not be overwritten.
- Rejected means you should open the relevant module, correct the real payload, and resubmit.
- Platform and Supplier owner badges show which side currently owns the next action.
- If PTR or NS is marked as External, manage that part outside the internal request module unless you explicitly enable internal management first.