How to Handle Blacklisted IP Addresses in the APNIC Registry
 Stephanie
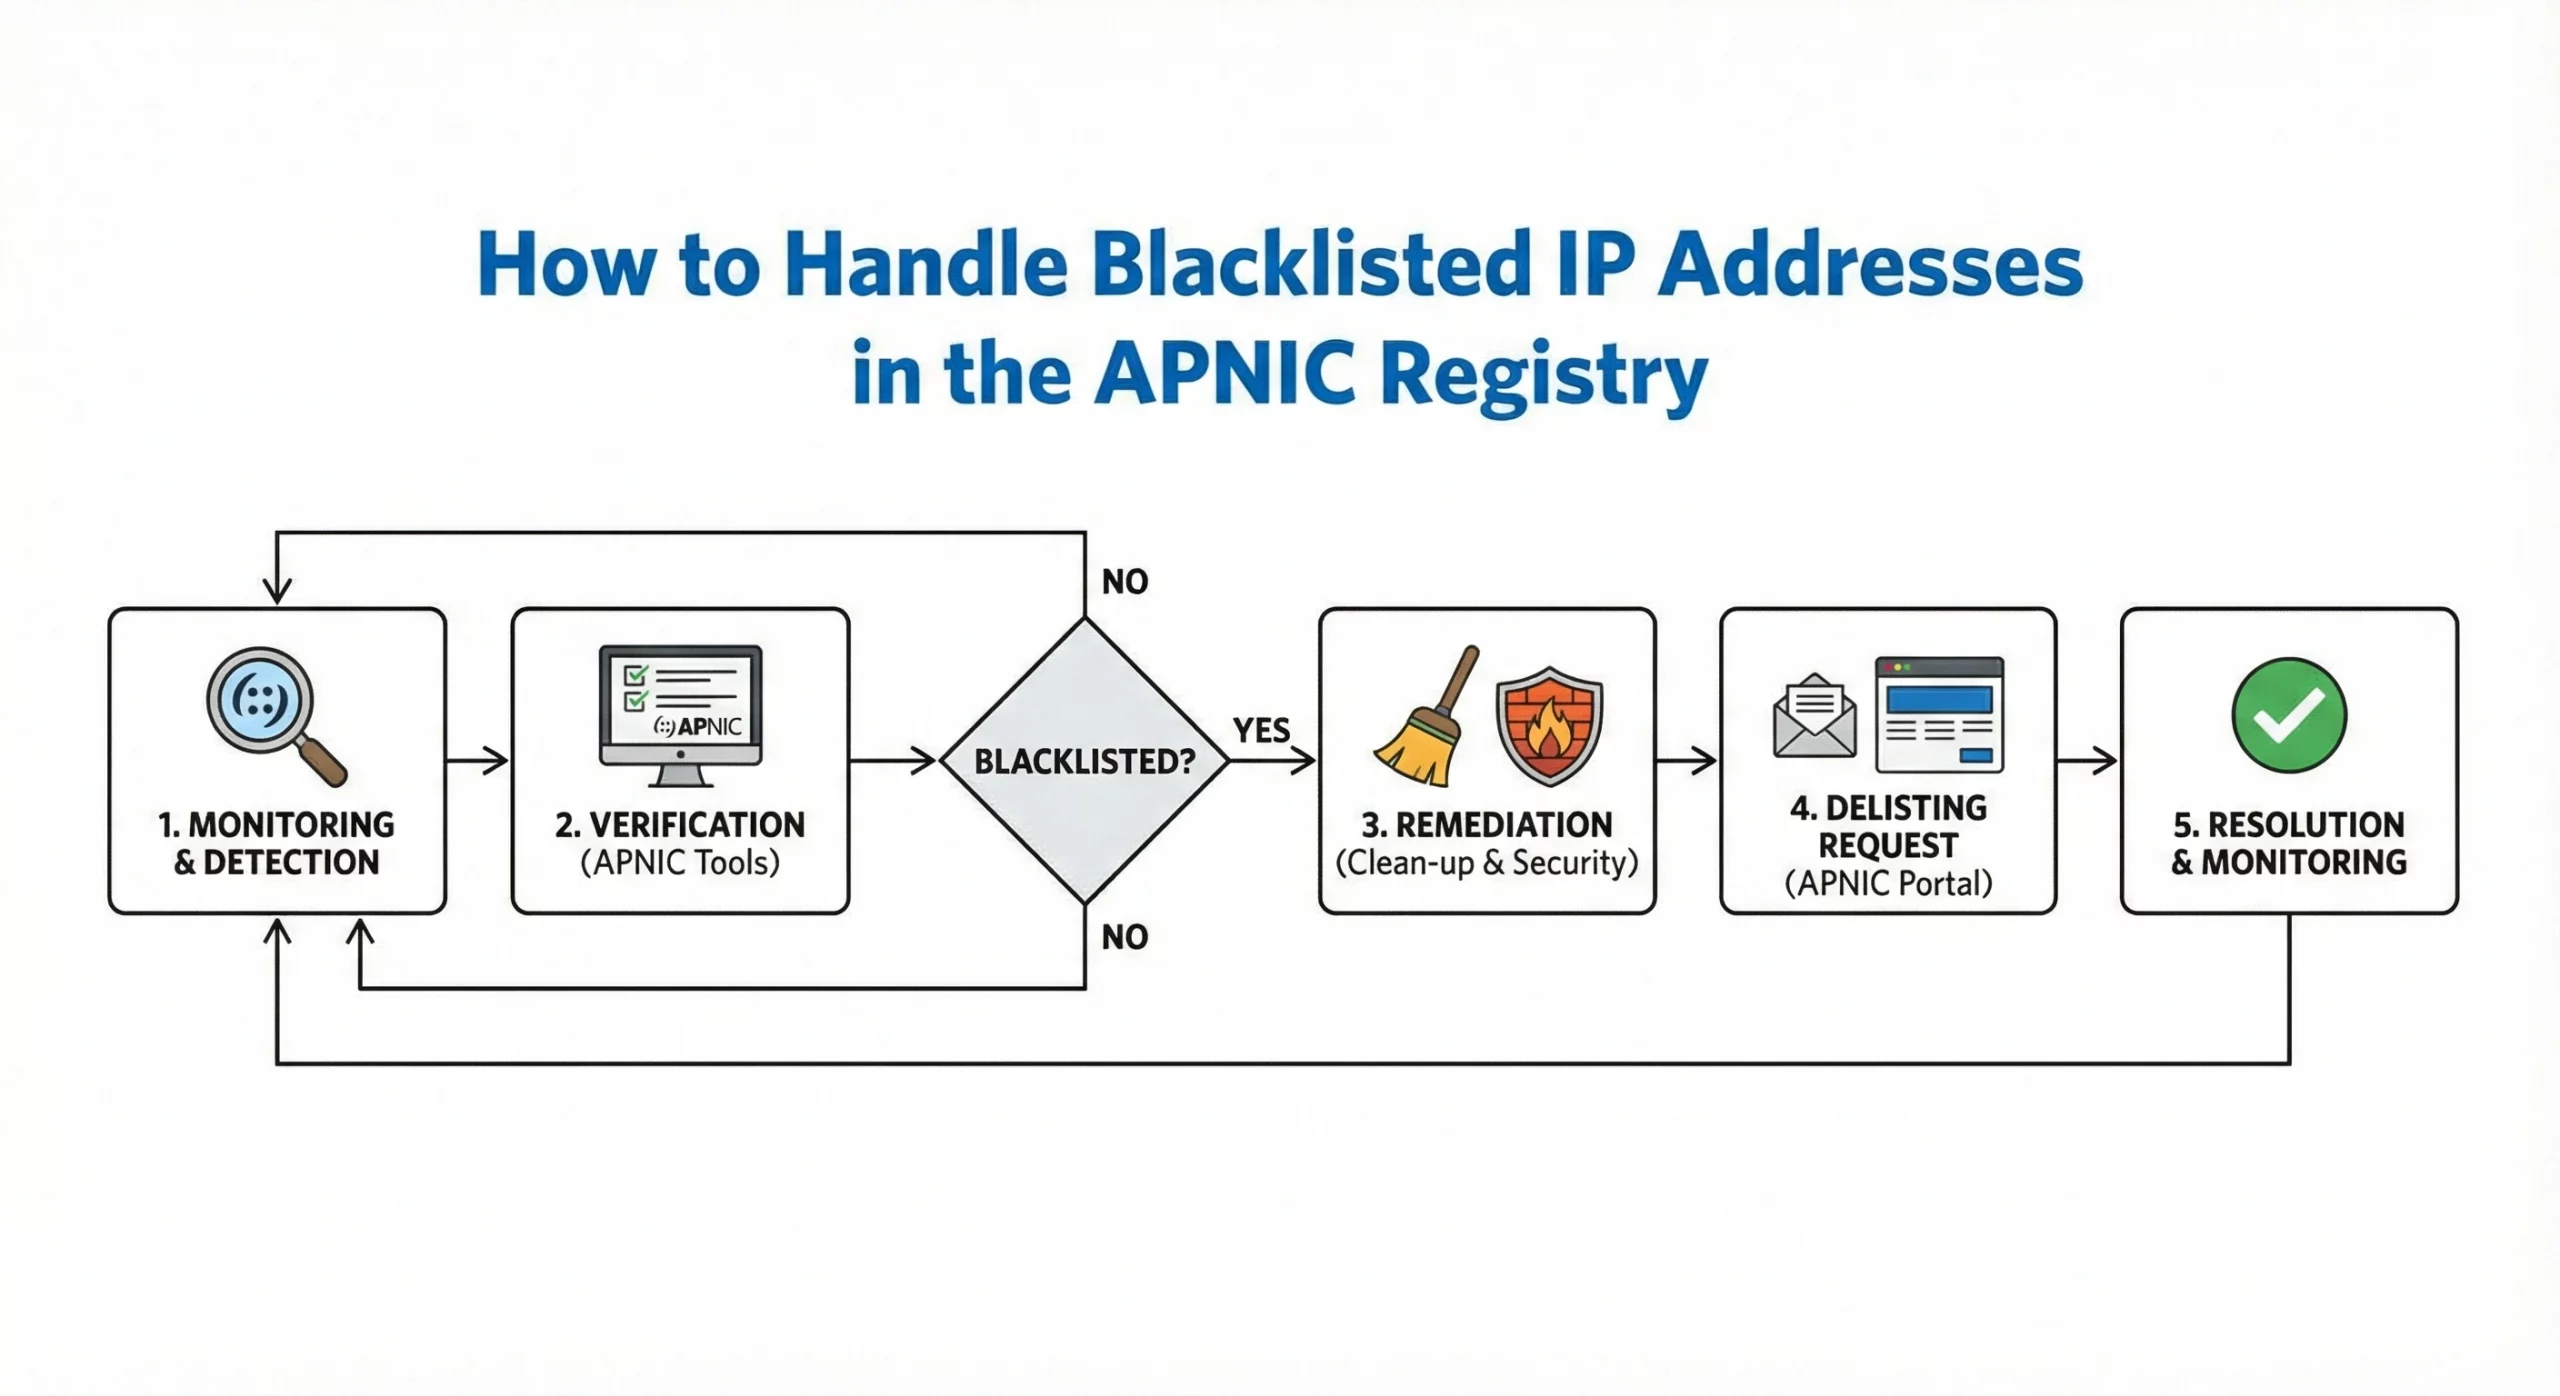
Table of Contents
In today’s internet ecosystem, maintaining a clean and trusted IP address range is crucial for any organization that manages network infrastructure. If you’re working with IPv4 resources in the Asia-Pacific region, chances are you’re dealing with APNIC — the regional Internet registry responsible for IP allocations.
But what happens when an IP address you’ve been assigned — or one you’ve acquired through transfer or lease — ends up blacklisted?
Having an IP address appear on global spam or abuse blacklists can significantly disrupt your operations, affecting everything from email delivery to server accessibility. Here’s how to manage and remediate blacklisted IPs within the context of APNIC-managed networks.
1. Verify the Blacklist Status
Before jumping to conclusions, it’s essential to confirm that the IP address is actually blacklisted. This can be done using specialized online tools like:
- MXToolbox
- Spamhaus IP Checker
- AbuseIPDB
These tools scan a wide range of global blacklists to determine if your IP is flagged. Note that being listed on one blacklist may not always cause problems, but widespread blacklisting usually signals deeper issues.
2. Investigate the Cause
Once you’ve confirmed the blacklisting, the next step is understanding why it happened. Common triggers include:
- Compromised servers sending spam
- Misconfigured mail servers acting as open relays
- Traffic associated with malware or phishing
- Previous misuse by another organization (in the case of leased or transferred IPs)
Use your server logs, intrusion detection systems, and firewall analytics to trace suspicious activity. This step is crucial before moving forward with any kind of delisting.
3. Resolve the Underlying Problem
Removing your IP from a blacklist is pointless if the issue that caused the listing persists. Depending on the root cause, you might need to:
- Clean up infected systems or software
- Implement rate limits on outgoing connections
- Harden mail server configurations (enable SPF, DKIM, and DMARC)
- Block suspicious outbound traffic through your firewall
For leased IPs, it’s also wise to request documentation from the provider regarding previous use and known issues.
4. Request Delisting
Once the problem is fixed, the next move is to reach out to the organizations managing the blacklists. Most maintain a process for delisting requests, usually accessible via their website. You may need to:
- Provide proof that the issue has been resolved
- Share logs or details about the cleanup
- Confirm your ownership or authorization to use the IP
The response time can vary from hours to several days, depending on the blacklist operator’s policies.
5. Prevent Future Listings
To avoid dealing with blacklist issues again, consider the following ongoing practices:
- Regularly scan your IP ranges for reputation problems
- Stay updated on best practices for server and email security
- Limit who can use or lease your IP addresses
- Monitor abuse notifications in MyAPNIC or other relevant dashboards
Consistent maintenance of your IP infrastructure — combined with a strong internal security posture — will go a long way in preserving your IP reputation.
Conclusion
Having an IP address blacklisted can be a major headache, especially when you’re relying on reliable connectivity and clean deliverability. But with the right tools and a proactive strategy, you can identify, resolve, and prevent blacklist issues — keeping your APNIC-assigned IPs in good standing across the internet.
Trusted IPv4 Leasing for Business Growth
Get enterprise-grade IPv4 space quickly, with seamless deployment and end-to-end management.
Get Started with i.leaseRelated Blogs
Related Posts
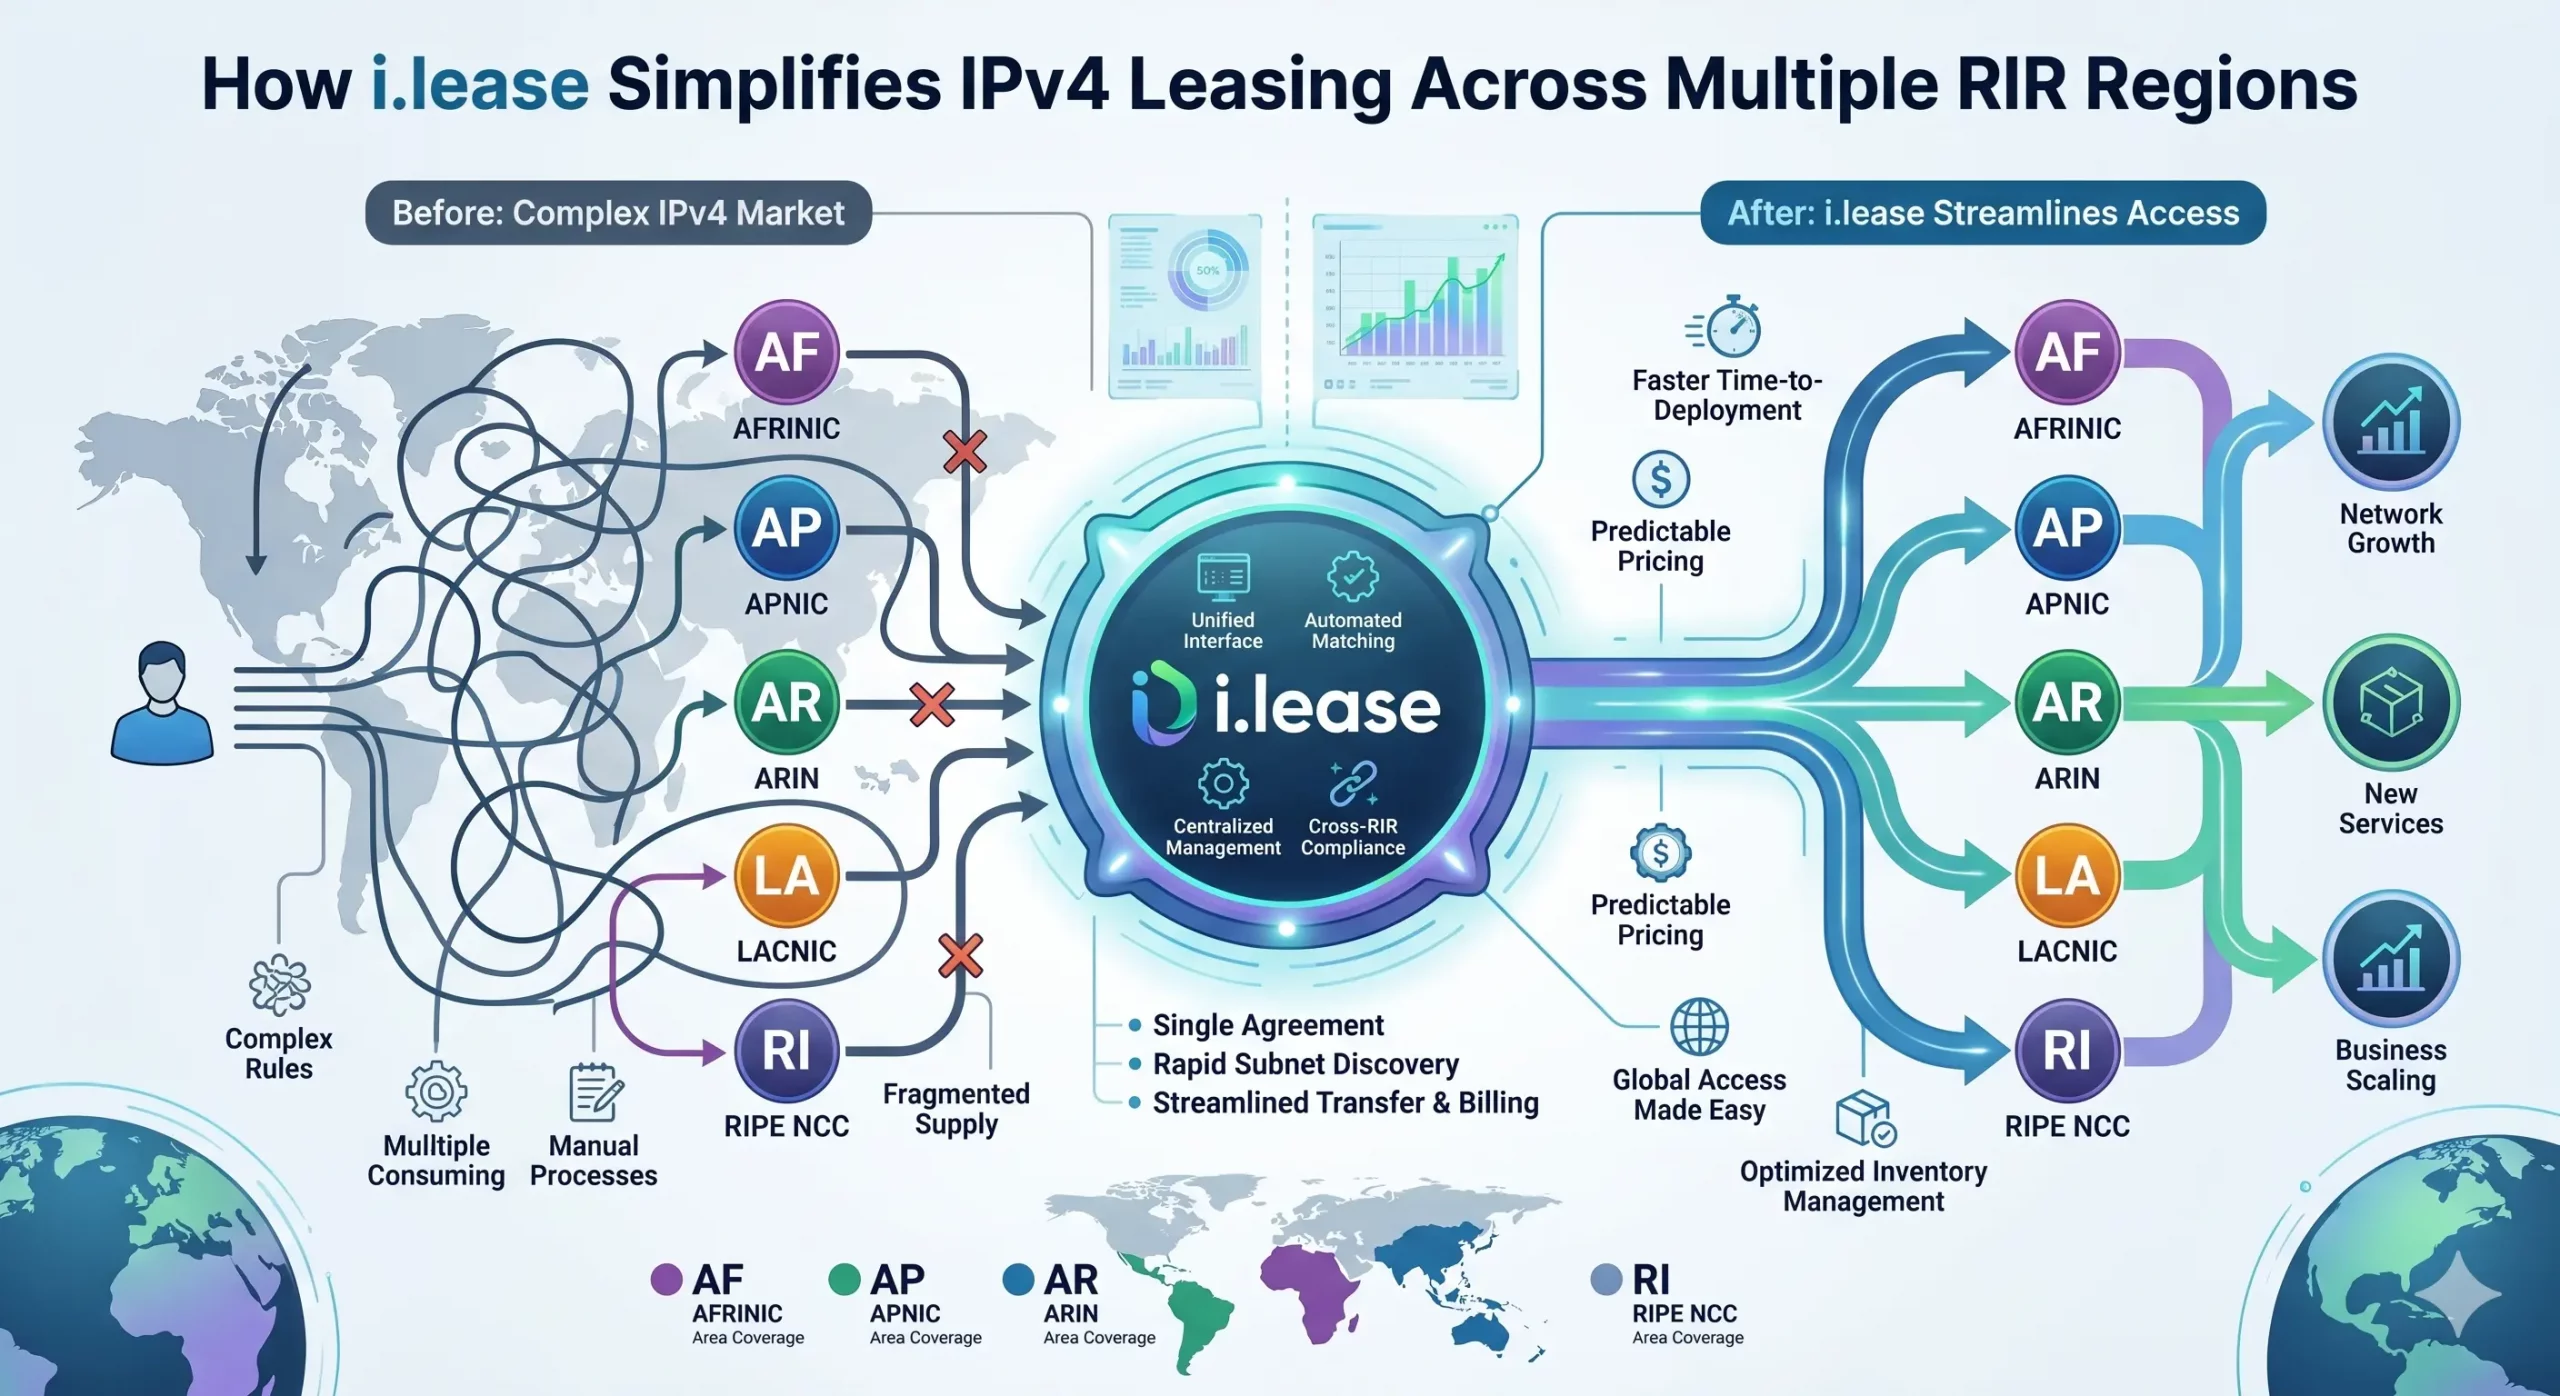
How i.lease Simplifies IPv4 Leasing Across Multiple RIR Regions
In today’s Internet infrastructure economy, IPv4 address leasing has become a critical operational strategy for enterprises, cloud providers, and network operators facing persistent address scarcity. As IPv4 exhaustion continues across all five Regional Internet Registries (RIRs)—ARIN, RIPE NCC, APNIC, LACNIC, and AFRINIC—the need for structured, compliant, and cross-regional leasing solutions has never been greater. However, beneath the surface of what appears to be a simple “supply-and-demand” market lies aRead more Related Posts Risk Placement in IPv4 Transactions: What Enterprises Should Know The IPv4 market has quietly evolved into a structured secondary asset class. As global IPv4 exhaustion continues, enterprises, ISPs, and Understanding Operational Risk in IPv4 Address Markets IPv4 has long stopped being a simple technical identifier system. It has become a constrained, priced, and operationally embedded infrastructure Por qué la mayoría de las empresas están expuestas accidentalmente al riesgo de fallo en la asignación de IPv4 La escasez de IPv4 es ampliamente comprendida. Lo que muchas empresas aún subestiman es el riesgo de continuidad relacionado con .related-post {} .related-post .post-list { text-align: left; } .related-post .post-list .item { margin: 5px; padding: 10px; } .related-post .headline { font-size: 18px !important; color: #999999 !important; } .related-post .post-list .item .post_thumb { max-height: 220px; margin: 10px 0px; padding: 0px; display: block; } .related-post .post-list .item .post_title { font-size: 16px; color: #3f3f3f; margin: 10px 0px; padding: 0px; display: block; text-decoration: none; } .related-post .post-list .item .post_excerpt { font-size: 13px; color: #3f3f3f; margin: 10px 0px; padding: 0px; display: block; text-decoration: none; } @media only screen and (min-width: 1024px) { .related-post .post-list .item { width: 30%; } } @media only screen and (min-width: 768px) and (max-width: 1023px) { .related-post .post-list .item { width: 90%; } } @media only screen and (min-width: 0px) and (max-width: 767px) { .related-post .post-list .item { width: 90%; } }

Risk Placement in IPv4 Transactions: What Enterprises Should Know
The IPv4 market has quietly evolved into a structured secondary asset class. As global IPv4 exhaustion continues, enterprises, ISPs, and brokers now routinely engage in buying, leasing, and transferring IPv4 address blocks. Alongside this growth, one topic has become increasingly important—but still under-discussed: risk placement in IPv4 transactions. For organizations participating in this market, especially through platforms such as i.lease, understanding how risk is identified, allocated, and mitigated isRead more Related Posts Risk Placement in IPv4 Transactions: What Enterprises Should Know The IPv4 market has quietly evolved into a structured secondary asset class. As global IPv4 exhaustion continues, enterprises, ISPs, and Understanding Operational Risk in IPv4 Address Markets IPv4 has long stopped being a simple technical identifier system. It has become a constrained, priced, and operationally embedded infrastructure Por qué la mayoría de las empresas están expuestas accidentalmente al riesgo de fallo en la asignación de IPv4 La escasez de IPv4 es ampliamente comprendida. Lo que muchas empresas aún subestiman es el riesgo de continuidad relacionado con .related-post {} .related-post .post-list { text-align: left; } .related-post .post-list .item { margin: 5px; padding: 10px; } .related-post .headline { font-size: 18px !important; color: #999999 !important; } .related-post .post-list .item .post_thumb { max-height: 220px; margin: 10px 0px; padding: 0px; display: block; } .related-post .post-list .item .post_title { font-size: 16px; color: #3f3f3f; margin: 10px 0px; padding: 0px; display: block; text-decoration: none; } .related-post .post-list .item .post_excerpt { font-size: 13px; color: #3f3f3f; margin: 10px 0px; padding: 0px; display: block; text-decoration: none; } @media only screen and (min-width: 1024px) { .related-post .post-list .item { width: 30%; } } @media only screen and (min-width: 768px) and (max-width: 1023px) { .related-post .post-list .item { width: 90%; } } @media only screen and (min-width: 0px) and (max-width: 767px) { .related-post .post-list .item { width: 90%; } }

Understanding Operational Risk in IPv4 Address Markets
IPv4 has long stopped being a simple technical identifier system. It has become a constrained, priced, and operationally embedded infrastructure asset class. “In the IPv4 market, execution is not paperwork. Execution is continuity under registry-layer uncertainty.”https://heng.lu/on-why-i-lease-exists-and-why-the-broker-question-is-really-a-registry-risk-question/ Yet most of the industry still speaks about it as if it were a straightforward marketplace problem: buyers, sellers, brokers, escrow, transfer, done. That framing is increasingly outdated. The real structure of riskRead more Related Posts Risk Placement in IPv4 Transactions: What Enterprises Should Know The IPv4 market has quietly evolved into a structured secondary asset class. As global IPv4 exhaustion continues, enterprises, ISPs, and Understanding Operational Risk in IPv4 Address Markets IPv4 has long stopped being a simple technical identifier system. It has become a constrained, priced, and operationally embedded infrastructure Por qué la mayoría de las empresas están expuestas accidentalmente al riesgo de fallo en la asignación de IPv4 La escasez de IPv4 es ampliamente comprendida. Lo que muchas empresas aún subestiman es el riesgo de continuidad relacionado con .related-post {} .related-post .post-list { text-align: left; } .related-post .post-list .item { margin: 5px; padding: 10px; } .related-post .headline { font-size: 18px !important; color: #999999 !important; } .related-post .post-list .item .post_thumb { max-height: 220px; margin: 10px 0px; padding: 0px; display: block; } .related-post .post-list .item .post_title { font-size: 16px; color: #3f3f3f; margin: 10px 0px; padding: 0px; display: block; text-decoration: none; } .related-post .post-list .item .post_excerpt { font-size: 13px; color: #3f3f3f; margin: 10px 0px; padding: 0px; display: block; text-decoration: none; } @media only screen and (min-width: 1024px) { .related-post .post-list .item { width: 30%; } } @media only screen and (min-width: 768px) and (max-width: 1023px) { .related-post .post-list .item { width: 90%; } } @media only screen and (min-width: 0px) and (max-width: 767px) { .related-post .post-list .item { width: 90%; } }